30 October 2012

Drying Rack !!!

 I was tired of losing a whole room floor to my drying of fleece...so I asked my wonderful bf 
to please make me a drying rack. I supplied old window screens, so all he really had to do was
make the frame. And this is what I got...awesome, fabulous, totally functional!!!


The screens slide out for ease of adding or removing fleece!!
I do plan on either painting or staining it darker, eventually.
Had to share!! Yay!! Happy, happy! :)

30 September 2012

Bunny Fluff


 Bunny fluff...wonderful bunny fluff...fuzzy, exquisitely soft and warm...
I have always known about Angora fiber, but I had yet to try and process and spin it myself.


So last summer, I decided to buy some.
Then it sat....in my stash...Like so many other wonderful fibers...
(I'm sure none of you know what I'm talking about...lol)

Clockwise from left...white, red and gray.
 Then...one day...I was inspired!
But how to process it...hmmmmmm.....
Well, firstly, I had to wash it, very carefully.
I know, some of you are probably thinking "no you don't'!
Well, I do. I wash all of my fiber before carding or combing it.
Even if you don't see the dirt, it's there. 
So I put it in a small lingerie bag and gave it a bath.


 It came out fine, although it looks pretty sad all wet,
but as it dries it fluffs right back up!


As seen in the picture above, it does have rather nice crimp...but it's so fine...
So I decided to card it with my cotton hand cards.


To get it in a spin-able state, I dizzed it off...then spun it right away.
I know it can be teased into a loose fluffball and spun that way,
  I just prefer to do it this way. 
It's so fine that it is rather difficult to roll into a ball like I would
normally do with fiber after dizzing. Well...actually, it's not the
turning it into a ball, it's the unrolling to spin, so it's better
to just diz and spin, diz and spin...


It is so slick that it is a little challenging to spin...
I admit, I actually over-spun it a little during my first attempt.
   

 And the yarn it makes it so lovely!

100%Angora
  And here is a skein of one ply of Angora and one ply of Rambouillet.
The Rambo was a slightly different weight, but I did this during a demo and decided it would be fine.


Next will be blending it with another fiber and spinning them together!

Happy spinning :) -Kim


27 June 2012

Confession of a Fiber addict...

So to other fiber addicts, this is just confirmation that you are not alone !!

I only learned to spin just over 3 years ago...I took a class, made some
amazingly horrible yarn, just like most everybody else, got better,
decided I really liked it and went crazy buying processed fiber.
 Then while looking around online, I saw an ad for free wool...
which I know now wasn't all that great...
but it sparked my love of raw fiber and of processing it all myself.
So I made a decision one day to sell all of my bought ready to spin fiber
and only work from raw...completely from scratch...
I've become quite the purist when it comes to fiber.

And it has now come to this...

Today I walked into my fiber room and stopped in my tracks and just stared...at this...
(And there's at least two layers here)

And it's not like I haven't seen it before...it's been growing there for a loooong time...
but you know how after a while you just don't notice things that are there?
 You just get used to it...  Well, I finally noticed again...

and in the living room, there is this...

Romney on the left and Bond on the right.
The Bond I just bought...what is wrong with me?
Oh, I know...too much time on Ravelry drooling over pictures of fleeces....
Like I needed more...but being a fleece addict...you know...it's tough...lol


Close up of the Bond...gorgeous chocolate color and amazing lock formation...drool...


And if that wasn't enough,
the lady at the post office gave me a huge box of what turned out to
be more fleece...can't imagine how it came to be sent to me....
I must be sleep surfing on the internet looking for fleece... ;-) LOL


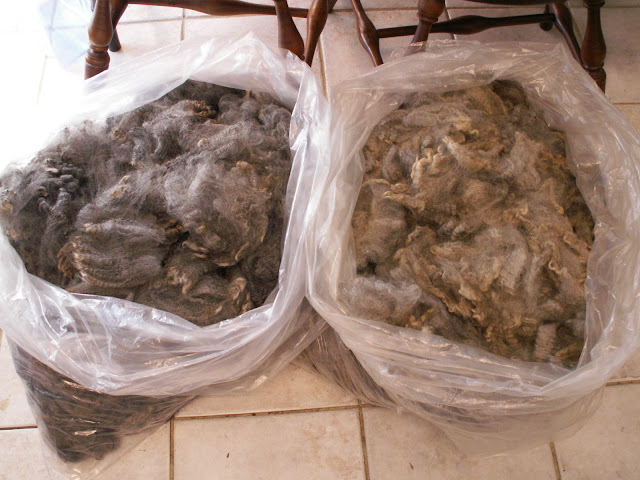
This is what was inside the box..12 pounds total of more Romney :)

They are both nice, but the one on the left is exceptional!!!
Pictures do not do it justice...

 It's the most gorgeous blue-gray color...just amazing...
and the crimp and softness...must touch to believe !!!


Oh, and I almost forgot, there is this CVM Romeldale fleece
hiding in one of the back rooms...


Isn't it just so pretty though...?
How can I resist?

There's also a Corriedale somewhere around here,
various Merinos and Rambouillets...
and let's not forget Angora bunny, Mohair, Alpaca...
Oh, where does it end ??!!!

But I have promised myself no more new fleeces...at least until
I wash all of the ones I already have...goodness knows how long that will take!!
I better be done by October...cause there will be tables of fleeces
at the Fall Fiber Festival at Montpelier just begging to go home with me !! :)
(I'll need willpower to stick to that promise)


I have been doing some washing...actually I wash almost every day.

Here is a Romney/Rambouillet fleece acquired from MDSW this year...

 Whole fleece...all 9 pounds of it...it took up my entire living room floor!

Close up of locks...sunbleached tips actually make for a nice heathery yarn.

All washed and ready for carding/combing.

 Some Romney drying...

So, I have confessed to the world...well, at least anyone who reads this,
that I do have an addiction...not exactly bad for my health,
maybe my bank account...but it's fun, I love it...it makes me happy! Yay!!

The boyfriend doesn't mind either...what more can I ask for??...hahaha...

Happy washing, carding, combing, spinning, knitting...etc.....

-Kim


29 April 2012

Using Valkyrie Super Fine Combs

Thought I'd do a little demo using my Super Fine Valkyrie combs.
I am using huacaya alpaca from Lagniappe Farm(see link in website list).
You may notice that static starts to form. You can deal with it or
you can lightly mist it with a spray bottle...very lightly...
just enough to tame the static.
  I have attached one of the combs to the table to use stationary like a hackle.
This is just my preference. 
The combing width is 3" and the tines are 3"high.
There are 3 rows of tines with 25 tines across the front.
I am very glad I invested in these, they work maaaaavelously!!
(The comb and hackle in the background is from Blue Mountain Handcrafts)


And here are some pictures of the combs.


12 March 2012

Wet Felting

The wet felting workshop I hosted on the 25th of February, I thought, was great fun!! 
I know I learned a lot. I can't wait to do more of it :) 
I've included some pictures here of the process and of the finished projects!

Choosing fiber for wrapping the potato(used as a form).
 
Add thin layers of fiber, make sure not to make it too thick.

Pouring hot soapy water over the fiber on the potato.

Squeezing soapy water through fiber.

Keep turning and squeezing until the fiber felts, this may take a little while.
A fine example of felted fiber.
An original design!

Cutting out the flap.

Slide the felted fiber off of the potato.
Starting the fulling process, using ridged liner for a resist material.
Made sure to get all sides.
Turn it inside out and full the inside as well.
Any loose fiber that just wouldn't felt can be needle felted into place.

Rinsing the soap out.
Select roving for the handle to make a small hanging pouch.
  
Using the resist material to felt the handle.

Also, you can roll it in your hands to felt the fiber.
 
Needle felting the handle into place.

This is a very interesting design, all done during the fulling process.

A cute little cup or bowl!

Finished pouch.

Another fine example!

I feel fortunate to know so many talented people!
Thanks to everyone who attended :) -K

PS - I know some of the pics were a little blurry, my camera just wasn't cooperating that day, sorry about that. Maybe it's time for a new one...


13 February 2012

Fiber Dyeing for Wet Felting Workshop

I'm so excited to be able to offer the upcoming workshop on wet felting. 
In preparation for it, I needed to wash some suitable fiber and then after consulting
a few friends, decided it would be a good idea to offer some bright colors! 
 My friend Merian, (who generously offered to head the workshop)
 was happy to help with the dyeing. 
I myself have only dabbled in natural dyeing.
This was going to be mostly Kool-Aid dyeing!
How fun and interesting. I knew I would be learning something new...
I'd like to say that I helped, but Merian is a one woman show when she's dyeing! 
I've included pictures of the steps involved with this kind of dyeing.
It made some very vibrant colors..

First the (pre-washed) wool is soaked in warm soapy water.


Add kool-aid packets to gallon size plastic bag.(anywhere from one to 4 or more)

Add a glug of white vinegar(no photo for this), then add some water and make sure all of the powder has dissolved.

Add a couple handfuls of the wet fiber and then pour boiling water into the bag.

Seal the bag and gently turn bag to mix the contents together. Be gentle, you don't want to cause felting. Then let sit so the fiber can soak up the dye. The water will become mostly clear or slightly milky colored when the dye has been absorbed.

Next, take fiber out of bag, squeezing gently, then add to a bath of soapy water to wash out any remaining dye.

Drain and rinse, then squeeze as much liquid out of fiber as possible, remembering to be gentle.

Lay fiber out to dry!  Wonderful colors!!
The batts I've drum carded up so far for the wet felting!